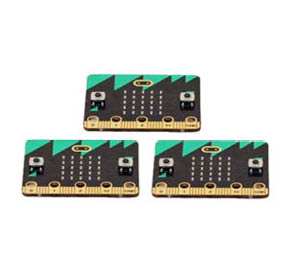
The BBC micro:bit is one of the most exciting pieces of technology to arrive in schools in a generation. This small programmable device is designed to engage students with programming and programmable hardware. If your school has registered, every Year 7 student will receive one and there are lots of resources online to support you and your students taking your first coding steps.
The device is Bluetooth enabled and along with its five-by-five board of LEDs and push-button switches, you will also find a compass and an accelerometer. On the bottom of the BBC micro:bit is a row of connections, which can be used to output to devices or detect inputs from sensors. I’m going look at the five large connections which can be quickly connected to with crocodile clips.
Pins 0, 1 and 2 are connections that can turn things on or off; output frequencies to drive sounders or servos; and output ‘analogue’ values. They can also be used as inputs either for reading analogue sensors or digital values.
Here are a couple of simple ideas to try with your I/O connections.
Connecting an LED
Try this exciting first project with your students.
You will need:
- a BBC micro:bit and USB lead
- an LED (and possibly resistor)
- crocodile leads
Connect the positive leg of your LED to pin 0. Connect the negative leg of the LED to the GND pin (you may wish to include a resistor here depending on your LED).
You will be using the block editor in this example. Select a new file and choose ‘pins’ from the drop down list of functions; you will need to pick up the digital write block. Making sure that pin 0 is selected on the drop down options, try compiling this code onto your BBC micro:bit:

The LED lights when the number one is written to the board. To turn off the LED, change the code above to write the value 0 to pin 0 and save to the device. You may need to press ‘reset’ after the code is saved onto the device to start the program.
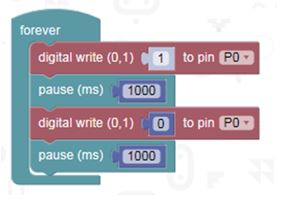
To turn the LED on and off, type the code below into the block editor:
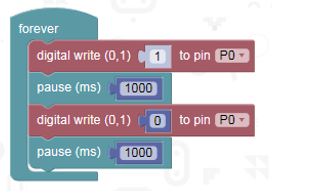
We have used a pause of one second (1000ms) to create a flash and wrapped it in a forever loop to create a flashing effect.
Connecting a buzzer
Another simple way to demonstrate the connection pins is by making the BBC micro:bit control a buzzer.
You will need:
- a BBC micro:bit and USB lead
- 3V piezo buzzer (with drive)
- crocodile leads or banana plugs
Connect up your buzzer to pin 0 and GND (similar to the LED previously).
Take this a step further and try out the micro:bit’s accelerometer to sound a buzzer when it detects acceleration across its three axes – creating an alarm when the BBC micro:bit is moved.
These are just two ideas to get you started with this versatile piece of kit. There is a wealth of resources available online – and once you are confident enough, you’ll be designing your own projects for your students to explore. Happy coding!
Geoff Hampson, Director of Kitronik